ALLi author member Denise Gaskins is back with the second blog of a two-part series explaining how to create a DIY nonfiction index. Readers come to nonfiction books looking for information, and making that search for info as easy as possible includes creating an index.
- Indexes can be extremely useful for your readers and make it easy for them to find the information they want.
- The difference between a table of contents (TOC) and an index. The TOC is a bird’s-eye-view outline of your book. It shows the main chunks of your topic and how you’ve organized them for the reader. An index is a list of all the little details that make your book worth reading.
- It takes much more work to create a DIY nonfiction index in eBooks, because you'd have to create hyperlinks for each individual “page” reference. Way more work, for not much return.
- When you're ready to start your index, give yourself plenty of time.
- Brainstorm your list of topics and record the list on paper.
If you want to catch up with the details in the first post on how to create a DIY nonfiction index, you can do that here.
How to create a DIY nonfiction index, part two
Now we’re ready to move to the computer desk and show you how to DIY a nonfiction index.
 Many experienced book designers prefer to work in Adobe InDesign, a powerful program for book layout and construction. It’s a great choice for indexing, too — but the learning curve was too much for me. Even though I do my paperback page layout in InDesign, I always make my indexes in Microsoft Word. I find Word’s indexing system a better fit for the way I think.
While most of the tips below will apply to any program you use, the technical details are specific to Word.
Save a new file
Don't try to create a DIY nonfiction index until you’ve finished all the other work on your book. Making changes after indexing can throw everything off, so be sure your page layout is complete and final. Save this document as your master file.
Then save it again with a new name as your indexing file. Indexing adds a lot of invisible stuff to your documents, and you don’t want to risk messing up your master file.
Go through your indexing file and insert a manual page break at every place where a page ends in your master file. This will give you freedom to adjust the index document’s layout without changing page numbers. In particular, you’ll probably want to increase the page size to make room for all those new invisible characters.
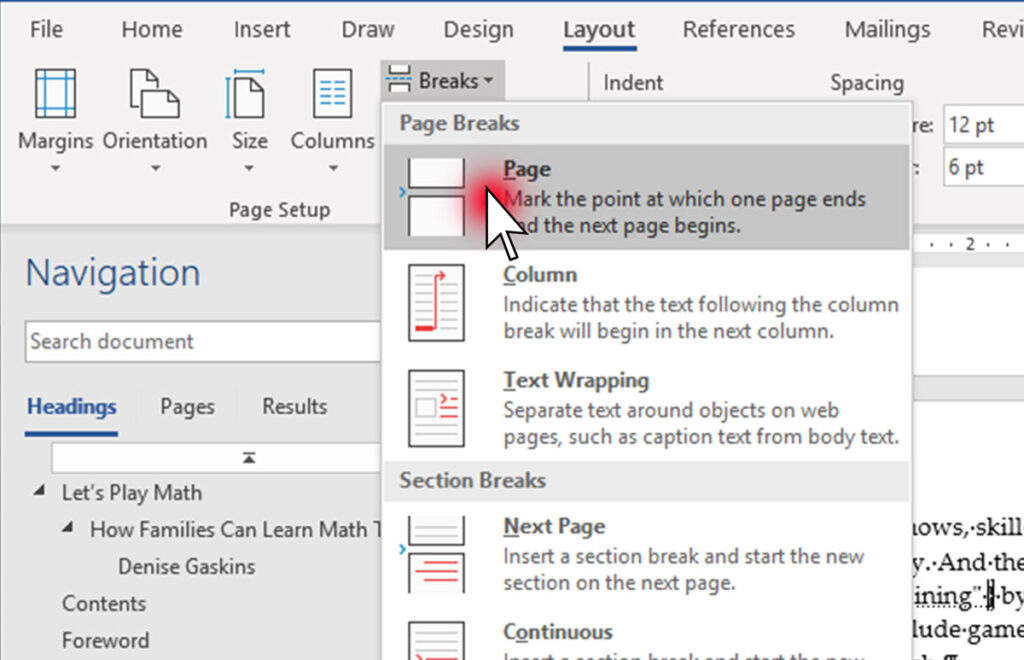
The keyboard shortcut for a manual page break is Control-Enter (or Command-Enter on a Mac)
If you have a page in your book that's only illustration, you can leave a blank place-holder page in the indexing file. Or add a sentence describing the illustration, if you want to reference it in your index.
Double check to make sure the page numbers of your indexing file echo the pages of your master book layout. Don’t worry about whether the pages look the same, but you need all the right words and paragraphs on each page with the manual page break at the bottom.
Once your indexing layout matches perfectly, go back to the Home tab. Click the backward-P symbol to show hidden characters. This will let you see exactly what Word is doing with your file.
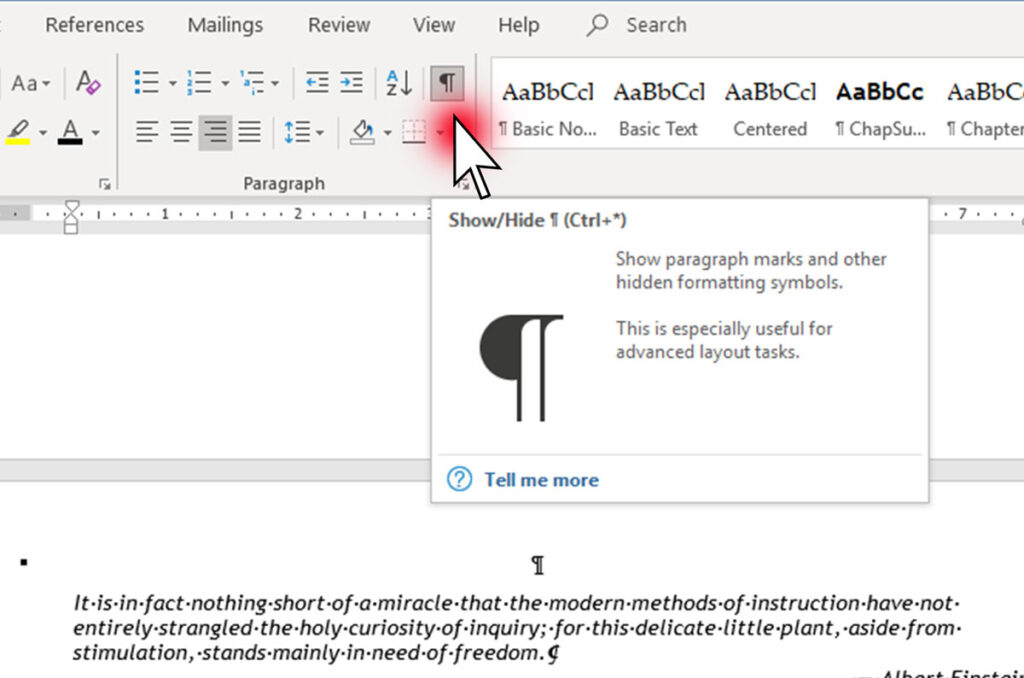
Don’t let Word keep secrets about your file! Show those hidden characters.
Mark your index topics
Turn to the first page of the paper manuscript you labeled with index topics during your brainstorming sessions. Open the matching page of your indexing file.
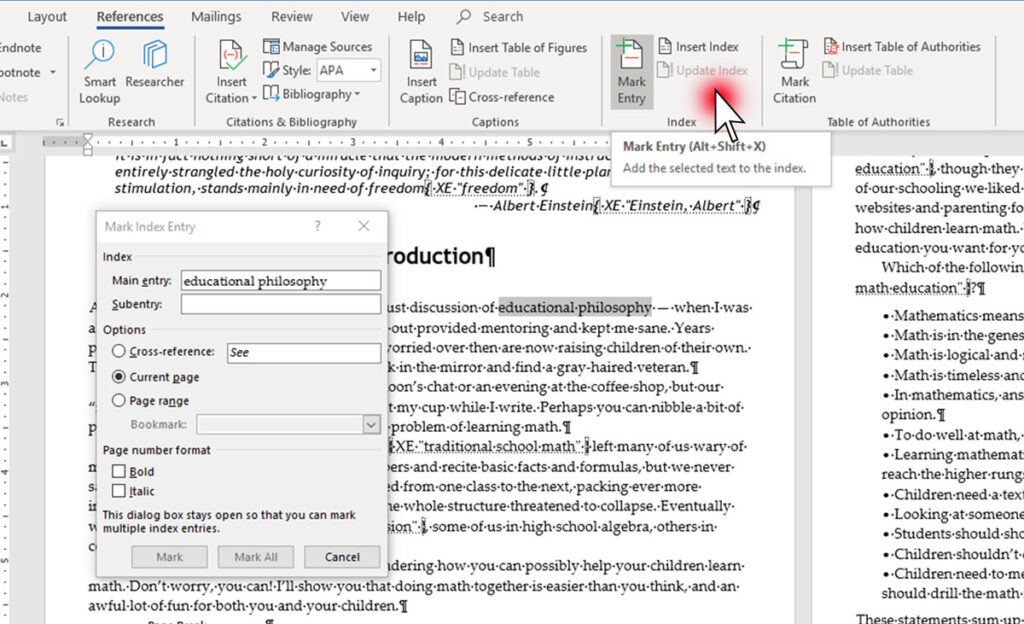
On Word’s References tab, you’ll find the Index settings. Click the “Mark Entry” button to open the indexing dialog form.
If you’ve done your planning well, marking the index entries will be easy
If your text contains the exact words you want to use in your index, you can highlight those words and then click in the “Main entry” text box. Word will fill in the words automatically. If you don’t see the words you want, place your cursor anywhere in the relevant paragraph and then type your index topic into the form.
Choose “Current page” for the reference option. Cross-references irritate readers by making them work harder to find the information they want. If the topic is important enough to list in your index, it’s important enough to have its own page numbers.
Ignore the bold or italic formatting for page numbers. You can add all the formatting you want later, after you paste the final index back into your master document file.
Finally, click the “Mark” button at the bottom of the dialog box. Word will add your index entry to the page in special hidden-character brackets like this: { XE “educational philosophy” }. Or if you chose to have both a main entry and subentry, those will be separated with a colon like this:{ XE “teaching:math facts” }.
The words inside the straight quotation marks are what will show up in your index, and you can edit them if you want. Or save typing the same entry on later pages by copying the whole chunk — special brackets and everything inside — and pasting it wherever the topic applies.
The dialog box will stay open until you tell it to close, so you can work steadily through your file marking one entry after another.
As you add indexing markup, keep an eye on those manual page breaks, to make sure your index’s page numbers still echo your book’s master file. Adjust the page size, decrease the font, whatever it takes to maintain a page-for-page match between the files.
Warning: Use the “Mark All” button with caution. The software doesn’t know how to distinguish between an informative paragraph and a passing reference to the topic.
Tips for index entries
- Except for proper nouns, do not capitalize index entries.
- Enter names as “Last name, First name” separated by a comma.
- Do not use quotation marks or other symbols in your index entries.
- Be concise. Avoid articles (a, an, the) where possible.
- Adjectives come after the topic nouns, separated by a comma: “noun, adjective.”
- For gerund phrases, you may want to enter them both in plain speech and inverted style. That is, I might enter { XE “counting on fingers” } and { XE “fingers, counting on” } both on the same paragraph, so the reader can find it in the index either way.
- If you want to use the “Page range” option, you have to set up bookmarks first. See Microsoft’s support information here.
For more detailed information about formatting index entries, see this chapter from the Chicago Manual of Style here.
After you’ve marked everything you planned to use in your index, plus anything else that came to mind as you were working, it’s time to generate your first draft.
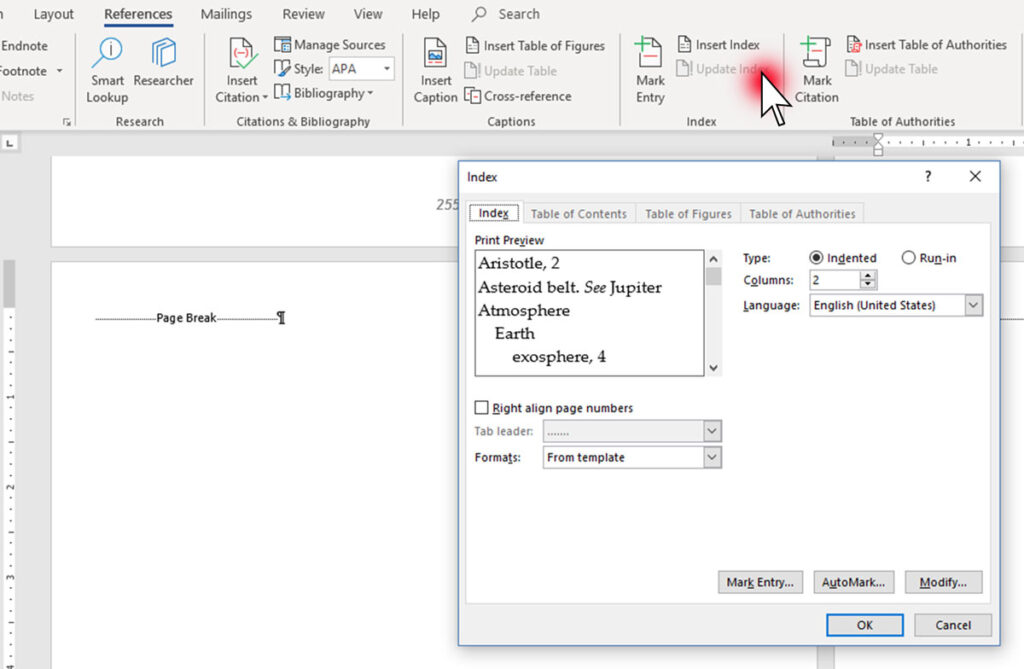
Go to the end of your file and insert another page break. Then on the References tab, click the “Insert Index” button to open a new dialog box.
Leave the default settings alone, and click OK. Let Word do its magic.
Generate an index to see the results of all your hard work
Refine your index
Now it’s time to go back around the process cycle I described in Part 1. If you want to make your index truly helpful, you need to think like a reader.
Does your newly-generated index make sense?
Can readers find the information they want?
Do you need more index topics? Or do you need to rearrange the current entries?
I like to print out my index pages so I can compare everything to my master document and mark changes on the paper.
- Check every page number to make sure it matches your master file.
- Double check all the spelling, especially for names.
- Omit repetitive entries (“pages 5, 6, 7”). I keep only the first page of a series, since readers can simply continue reading from there.
- Did you accidentally create two parallel topics with slightly different wording? If they are different enough to appear far apart in the index, you may want to keep both references (and make sure they both include all the page numbers). But if the terms are almost the same — perhaps you used a singular term on some pages and plural on others — choose one and edit the other entries to match.
- Do you need to add subtopics? Notice entries that have more than five page numbers. Add a few subtopics to make the index readable.
- Do you need to combine topics? Index entries with only one page number seem wimpy. Make the term a subentry under a broader topic, or go back and find more pages to reference for that topic.
When you are tweaking your index, don’t edit the generated output text. Find and fix the original markup on the pages in your indexing file. You want these changes to stick, even when you generate a new index — and if you're like me, you'll run several of them before you get the final version.
To edit an index entry, change the text inside the quotation marks. For example, if I decide my entry for { XE “teaching math” } is too broad a topic, I can break it down into subentries like { XE “teaching:hands-on” } and { XE “teaching:Socratic questions” }, leaving only the most general references under the original term.
If you decide to remove an index topic, be sure to delete the entire index entry field including the { } brackets.
After making all these changes, generate a new draft of your index.
Repeat until you’re satisfied.
Transfer to your master file
When your index looks as useful as you can make it, copy the final version. Paste it as plain text at the end of your master book file.
Take advantage of paragraph styles to make your index easy to read. Indexes use hanging indents, where the first line sticks out the farthest, just opposite of a normal text paragraph. Subentries fall under their main entry, with a bit of an indent. And if the page numbers run to a second line, that gets indented further.
Format your index in narrow columns and in a slightly smaller font size than your main text. Remember to put a “continued” line at the top whenever an entry or series of subentries spans two columns.
Read Joel Friedlander’s article on index formatting for details. He writes about using InDesign, but you can do the same sort of formatting with Word styles.
Update your index as needed
Revisions will happen. Ugh!
Now you have to go through your master file and your indexing file, comparing the text on every page. Replace all the lines that were changed, and mark any new index topics.
Then redo your indexing file’s manual page breaks from that point of the book onward. All your other markup (in the unchanged text) will be fine. Generate a new index and copy it back into your revised master file.
Figuring out how to create a DIY nonfiction index, and then doing it, can be a lot of work. But it’s worth every bit of effort, when you look at the index as an investment in your book’s future.
After all, well-written indexes make for happy readers. And happy readers give word-of-mouth recommendations to their friends.
And that’s the best book marketing of all.
Here's how to create a nonfiction index part two #indieauthor #selfpublishing #IARTG #ASMRG #writingcommunity Share on X
OVER TO YOU
Have you got another methods for how to create a DIY nonfiction index? What top tips do you have for creating them? Do you think it's worth creating those hyperlinks to the pages in the ebook format? We'd love to hear from you in the comments below.
If you enjoyed this post, you might like these from the archive: